Things to do after installing Artix Linux
-A comprehensive guide for new users (as me)-
//Updating Artix Linux//
Step 1.- System and packages update
//Installing needed packages for getting your OS up and running//
Step 2.- Install base-devel (a group of packages needed in Arch Linux)
Press enter to select them all
Step 3.- Install git (needed to clone packages from https://aur.archlinux.org/ )
Step 4.- Enable Arch Linux repositories
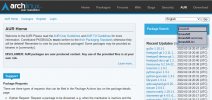
Resource:
https://wiki.artixlinux.org/Main/Repositories
4.1 Install artix-archlinux-support
4.2 Edit /etc/pacman.conf
4.3 Edit the file placing the following after [galaxy] and it's repositorie:
[extra]
Include = /etc/pacman.d/mirrorlist-arch
[community]
Include = /etc/pacman.d/mirrorlist-arch
It should look something like this:

4.4 Upgrade packages
(In this step you will see that the [extra] and [community] repositories will update too.
//Installing software in Artix Linux//
There are a few ways to install software in Artix Linux, as an example, I will show you two of them here but please see the note bellow.
-The pacman way-
(Steps 1, 2 and 4 needed)
Lets suppose you want to install a package name «blender». First, let's find it:

A) sudo pacman -Ss means: -find the software I’m looking in the reposipories- and «blender» is the package name.
B) As we can see, that command does return something, it says that it found in the [community] repositories a package name «blender».
C) And it gives a breef description of what that package is for.
To install «blender»:
(sudo pacman -S means -install- and hit enter in all the defaults)
What happens if sudo pacman -Ss does not find the package you're looking for?
Use «the git way»
-The git way-
(Steps 1, 2 and 3 needed)
Let’s suppose you want to install a package named «timeshift». First, let's find it:

The package was not found and we know it because it return anything.
So, go to:
https://aur.archlinux.org/
And in the search bar type the package you are looking for and hit enter.

After reading the description, as rule of thumb allways select the package with more votes and the most popularity and click on it.

1.- Copy the Git Clone URL

2.- In the terminal type:

(Hit enter to all the defaults)
Note: There is a shortcut to install packages via «the git way» that makes it easier and faster. Is by installing a package name yay (the most popular) or a package name paru. Personally I don't use them because I install very few packages in my OS and I prefer to be sure that I’m installing the most popular package from https://aur.archlinux.org/
Feel free to search in the web how to install and use yay, it’s easy but in my case it’s not worth it.
//Extras//
Install Nvidia drivers in Artix Linux.
Resources:
 wiki.archlinux.org
 nouveau.freedesktop.org
In my case, I have a "recent" Nvidia GPU (arround 6 or 7 years old [2015]), following the resourses above, the way I installed the proper drivers was:
(Yes, just one step)
One of my monitors was blinking and it stop after installing the driver and a reboot.
Install a Printer in Artix Linux
Resources:
https://wiki.archlinux.org/title/CUPS/Printer-specific_problems
(Most Important)
wiki.archlinux.org
In my case I use Artix - Cinnamon - Runit. I tried to follow the (MOST WATCH) tutorial in the youtube channel from the resourses and it was very usefull but most of the steps were not needed in my case to install my printer.
This are the steps I followed:
(You will find a new package installed)
(Please read "The git way" in this text)
(Open the new printer package installed and the drivers of your printer most be found by the software)
-A comprehensive guide for new users (as me)-
//Updating Artix Linux//
Step 1.- System and packages update
sudo pacman -Syu//Installing needed packages for getting your OS up and running//
Step 2.- Install base-devel (a group of packages needed in Arch Linux)
sudo pacman -S base-develPress enter to select them all
Step 3.- Install git (needed to clone packages from https://aur.archlinux.org/ )
sudo pacman -S gitStep 4.- Enable Arch Linux repositories
Resource:
https://wiki.artixlinux.org/Main/Repositories
4.1 Install artix-archlinux-support
sudo pacman -S artix-archlinux-support4.2 Edit /etc/pacman.conf
sudo nano /etc/pacman.conf4.3 Edit the file placing the following after [galaxy] and it's repositorie:
[extra]
Include = /etc/pacman.d/mirrorlist-arch
[community]
Include = /etc/pacman.d/mirrorlist-arch
It should look something like this:
4.4 Upgrade packages
sudo pacman -Syu (In this step you will see that the [extra] and [community] repositories will update too.
//Installing software in Artix Linux//
There are a few ways to install software in Artix Linux, as an example, I will show you two of them here but please see the note bellow.
-The pacman way-
(Steps 1, 2 and 4 needed)
Lets suppose you want to install a package name «blender». First, let's find it:
sudo pacman -Ss blenderA) sudo pacman -Ss means: -find the software I’m looking in the reposipories- and «blender» is the package name.
B) As we can see, that command does return something, it says that it found in the [community] repositories a package name «blender».
C) And it gives a breef description of what that package is for.
To install «blender»:
sudo pacman -S blender(sudo pacman -S means -install- and hit enter in all the defaults)
What happens if sudo pacman -Ss does not find the package you're looking for?
Use «the git way»
-The git way-
(Steps 1, 2 and 3 needed)
Let’s suppose you want to install a package named «timeshift». First, let's find it:
sudo pacman -Ss timeshiftThe package was not found and we know it because it return anything.
So, go to:
https://aur.archlinux.org/
And in the search bar type the package you are looking for and hit enter.
After reading the description, as rule of thumb allways select the package with more votes and the most popularity and click on it.
1.- Copy the Git Clone URL
2.- In the terminal type:
git clone [and the url you just copied] cd timeshiftmakepkg -si(Hit enter to all the defaults)
Note: There is a shortcut to install packages via «the git way» that makes it easier and faster. Is by installing a package name yay (the most popular) or a package name paru. Personally I don't use them because I install very few packages in my OS and I prefer to be sure that I’m installing the most popular package from https://aur.archlinux.org/
Feel free to search in the web how to install and use yay, it’s easy but in my case it’s not worth it.
//Extras//
Install Nvidia drivers in Artix Linux.
Resources:
NVIDIA - ArchWiki
CodeNames · freedesktop.org
In my case, I have a "recent" Nvidia GPU (arround 6 or 7 years old [2015]), following the resourses above, the way I installed the proper drivers was:
sudo pacman -S nvidia(Yes, just one step)
One of my monitors was blinking and it stop after installing the driver and a reboot.
Install a Printer in Artix Linux
Resources:
https://wiki.archlinux.org/title/CUPS/Printer-specific_problems
(Most Important)
CUPS - ArchWiki
In my case I use Artix - Cinnamon - Runit. I tried to follow the (MOST WATCH) tutorial in the youtube channel from the resourses and it was very usefull but most of the steps were not needed in my case to install my printer.
This are the steps I followed:
sudo pacman -S cups-runitsudo pacman -S system-config-printer(You will find a new package installed)
git clone (and the -Driver/filter- found in the "Most Important" resourse)cd (The printer file)(Please read "The git way" in this text)
makepkg -si(Open the new printer package installed and the drivers of your printer most be found by the software)
Attachments
Last edited:
